
Guide verified after launch - Game.fr editorial team
To start strong in Onimusha: Way of the Sword, you do not need to memorize every combo. Your first priority is to read incoming attacks, choose between guard, parry, Deflect and dodge, then turn each opening into an Issen. This guide covers the useful settings, the combat fundamentals, souls, the seven Oni Armaments, charms and New Game Plus.
Onimusha passes one million sales on its first day
The number is official. Capcom announced on that Onimusha: Way of the Sword had passed one million copies sold worldwide on its first day of release. Released on for PS5, Xbox Series X|S, Nintendo Switch 2 and PC, it is the first new main entry in the series in more than twenty years.
This launch pushes total franchise sales beyond 10 million copies. The wording "on its first day" follows the official Capcom announcement more precisely than "in 24 hours", which would imply a rolling window the publisher did not mention.
This guide was checked after the game's release. The date and platforms are also confirmed by Capcom's official launch page.
Seven essential tips for getting started
- Observe before attacking: the start of an enemy animation often tells you which answer the game expects.
- Guard to learn, parry to regain initiative: guarding keeps you safe, but a parry creates an opening.
- Use Deflect against stamina: when the enemy gauge reaches zero, trigger a Break Issen.
- Save True Issen for attacks you know: its power offsets a very short execution window.
- Absorb souls as soon as the space is safe: they heal, fund progression and feed Oni powers.
- Adapt your Oni Armament to the fight: healing, range, groups and resistant targets call for different tools.
- Review your charms after several failures: equipment can fix a lack of health, stamina or Oni power.
Difficulty and settings: prepare your first run properly
Story mode increases Musashi's health damage and stamina damage, reduces the damage he receives and enables action prompts by default. Action mode is aimed at players already comfortable with demanding combat games. You can switch between these two difficulty levels at save points; Carnage follows different rules after the ending.

The three settings to test immediately
- Lock-on: useful in duels, but worth disabling when several Genma attack from outside the camera.
- Camera: choose a sensitivity that lets you follow a target without losing the readability of its animations.
- Assists and controls: keep action prompts while learning, and test your layout before memorizing timings.
Choosing Story mode does not stop you from learning the system. It is better to understand defense cleanly and raise the difficulty later than to compensate for poor attack reading through repeated trial and error.
A ten-minute routine for tuning the game
Before pushing deeper into the story, use the first fights as a laboratory. Start by holding guard so you can watch two or three enemy strings without trying to punish every hit. Then test the parry on the slowest attack, and move to Deflect once that animation becomes predictable. This progression prevents you from mixing up inputs and immediately gives you a visual reference for each timing.
Also vary the camera in an area with several enemies. In a duel, lock-on helps keep the enemy centered and lets you read shoulders or weapons. Against a group, it can hide a Genma standing to the side. Build the habit of briefly unlocking to reposition Musashi, then selecting the most dangerous enemy: an archer, a fast opponent or a creature ready to launch an area attack.
When should you move from Story to Action mode?
The best indicator is not the number of victories, but how you earn them. If you regularly finish encounters with stamina available, recognize attacks that cannot be blocked and trigger Break Issen on purpose, moving to Action mode becomes natural. If you mainly survive through healing or repeated quick attacks, stay in Story a little longer to strengthen the basics. The difficulty change is not a permanent commitment: use it as a learning tool.
Explore without breaking the pace of progression
Detours are not just for filling in a map. They let you recover chests, materials, charms and several optional Oni Armaments that directly make the next fights easier. When a side path appears, explore it before crossing a major transition, especially if the main objective seems to lead to a boss or a new area. Oni Vision skills tied to treasure and search range become especially profitable for spotting less visible chests.
Use Spirit Mirrors as preparation points, not only as save points. Before leaving, check available upgrades, your equipped Armament, charms and healing items. This check takes less than a minute and keeps you from entering a long sequence with unused resources or a loadout built for the previous fight.
Prepare a boss before the first attempt
When the environment hints at an arena, fill health and Oni power as much as possible, then choose an Armament that answers a clear need. The Two Celestials adds safety, Earth-Shakers helps against firm defenses and Flashing Void favors concentrated damage. For the first try, prefer stable charms over a conditional bonus that is hard to exploit.
That first encounter should mainly reveal the boss rhythm. Watch its phase changes, identify the attack that ends each string and note the moments when the camera or scenery becomes dangerous. Even if you lose, you will have precise information for changing your strategy instead of simply restarting faster.
Guard, parry, Deflect and dodge: which defense should you choose?
These actions are not interchangeable. The right decision depends on the attack, your confidence in its timing and the result you are trying to create.
| Action | When to use it | Main result |
|---|---|---|
| Guard | Against an attack you do not know yet | Lowers risk, but consumes stamina |
| Parry | At the moment of impact | Creates an opening and fills the Blaze Gauge |
| Deflect | To break the enemy rhythm or posture | Deals heavy damage to enemy stamina |
| Dodge | Against an attack that is difficult or impossible to block | Avoids the hit and can open a Reflex Dodge |
| True Issen | Just before the impact of an attack you have mastered | Avoids the hit and triggers a very powerful counter |

Guard is your observation tool. Parry then turns that knowledge into an offensive advantage and contributes to Blazing State. Deflect mainly targets stamina: it prepares Break Issen and can also return certain projectiles. Dodge remains essential when an attack should not be answered by blade contact.
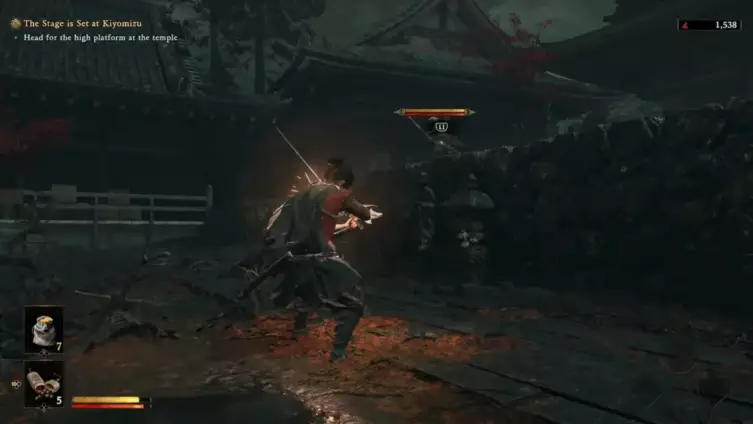
Good habit: against a new enemy, spend the first exchanges identifying its attacks. Look for consistency before speed.
This central role for parries is also described in PC Gamer's analysis of the combat system.
Read an attack before it even starts
Good defense begins before impact. First watch the opponent's posture: a weight shift, the weapon moving back, a special glow or an unusual pause often announces the nature of the strike. Fast attacks usually ask for a simple prepared answer; heavily wound-up moves leave more time, but punish reactions that come too early. Do not stare only at the blade: the torso and shoulders often give a steadier signal than the visual effect of the attack.
Against a new enemy, mentally sort its actions into three families. The first includes hits you can guard without immediate danger. The second includes attacks with clear enough timing for a parry or Deflect. The last includes grabs, area effects and offenses that force you to create distance. This classification reduces the number of decisions you must make during the fight.
Manage your own stamina
Watching only the enemy gauge is a mistake. A long guard can exhaust Musashi at the exact moment an opening appears. After blocking a string, avoid automatically answering with a full combo: land a few hits, back away if needed and let your stamina return. A short but safe punish is better than one extra attack that leaves you defenseless.
Positioning also supports that economy. Fighting near a wall limits dodging and makes the camera harder to read. When several Genma approach, move toward open space and keep the group in the same part of the screen. The goal is not to hit everyone at once, but to prevent an unseen attack from breaking your rhythm.
Adapt your answer to groups and projectiles
Against several enemies, focus on control instead of the perfect Issen. Eliminate weak targets that reduce your space, interrupt shooters and use area attacks when the group tightens. Some projectiles can be returned with a Deflect, but that option is worthwhile only if you can clearly see the attacker. When in doubt, a side dodge preserves your mobility and keeps you from remaining exposed to a second opponent.
Issen, Deflect Issen and Break Issen: convert every opening
Issen is the historic signature of Onimusha. In Way of the Sword, several variants reward different forms of mastery.
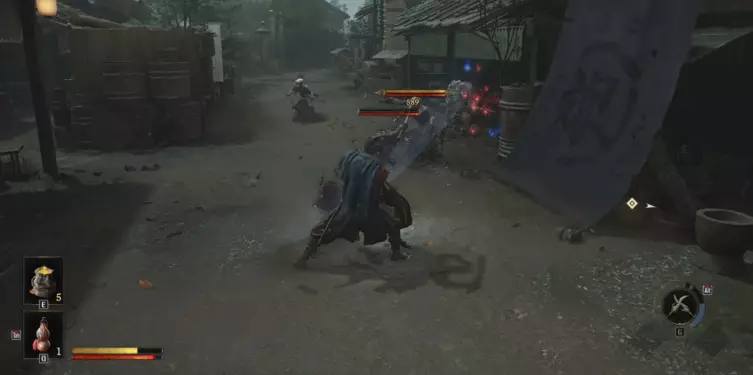
True Issen: attack just before impact
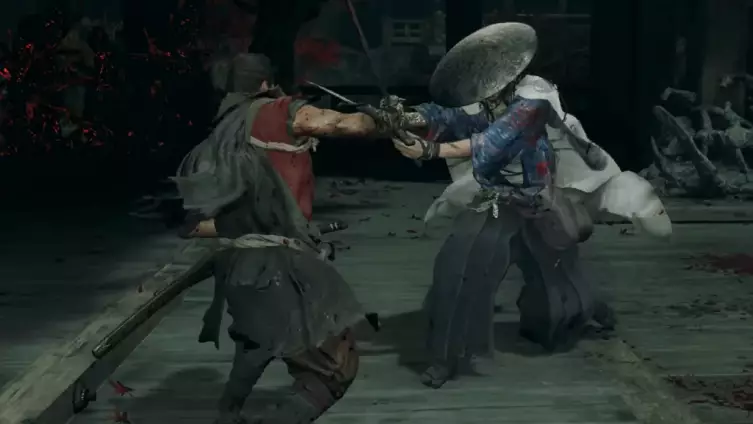
True Issen is not a parry. You launch your own attack just before the enemy strike reaches Musashi. Start with Genma whose animations are easy to read: trying this counter against every move from an unknown boss quickly turns a powerful technique into an unnecessary risk.
Deflect Issen and Chain Issen
Deflect Issen extends a successful defensive read into a counterattack. When an Issen lets you chain several targets, Chain Issen becomes an excellent answer to groups, as long as you keep the correct rhythm between strikes.
Break Issen: drain stamina first
Break Issen follows a safer logic: fully reduce the enemy's stamina, especially with Deflects, then strike during the stagger. Against a boss whose rhythm you do not understand yet, this method is generally more reliable than constantly hunting for True Issen.
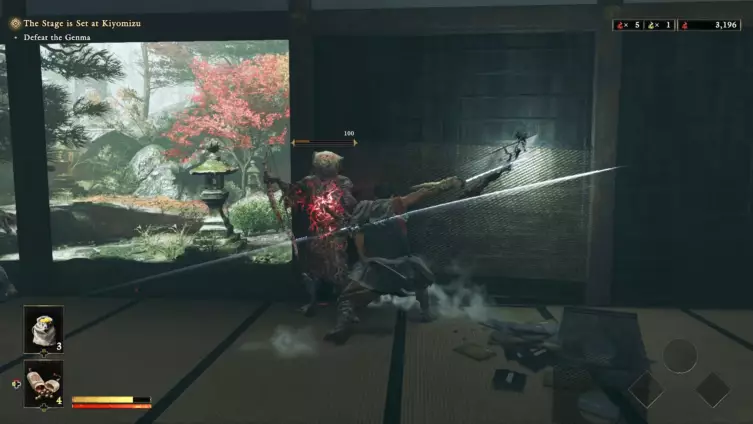
A progressive three-step training method
To learn True Issen, choose a standard Genma and work on only one of its attacks. Step one: guard the hit several times to register the exact moment of impact. Step two: replace guard with a parry, which is more forgiving than an offensive Issen. Step three: trigger your attack slightly before contact. If Musashi takes the hit, you probably attacked too late; if your strike comes out normally without Issen, the timing was too early or the chosen attack was not suitable.
Do not immediately change enemy after your first success. Repeat the move until you can produce it deliberately several times. That way you build a real timing reference instead of relying on an accidental success. This method is especially useful before boss rematches and Carnage mode.
Choosing between True Issen and Break Issen
True Issen gives an immediate reward, but demands that you accept the risk of the enemy blow. Break Issen takes longer preparation and depends on stamina depletion. Against a familiar opponent, True Issen greatly speeds up the fight. Against a boss you still barely know, Deflects and Break Issen create a steadier strategy: every successful defense moves you closer to an opening without forcing you to gamble everything on one read.
When several Genma are present, check target positions before extending a Chain Issen. A spectacular chain is useful only if it does not move you back into the middle of a dangerous group. If the angle becomes poor, stop the offense, recenter the camera and regain control of space.
Exploit the opening without becoming reckless
After an Issen or a stagger, resist the urge to automatically empty your entire arsenal. First check the enemy's health, the opponents still active and your own stamina. A Break Issen can end the fight, but against a resistant target it sometimes mainly gives you the advantage back. Keeping one Oni resource for the next phase can be more profitable than adding damage to an opening you have already won.
Souls and upgrades: which resources should you prioritize?
Souls are not simple end-of-fight loot. They directly connect survival, progression and Oni powers.
| Color | Function | Priority |
|---|---|---|
| Red | Skills, upgrades and purchases | Long-term progression |
| Yellow | Health restoration | Immediate when health is low |
| Blue | Recharge for the Oni Armament gauge | Before a dangerous group or boss |
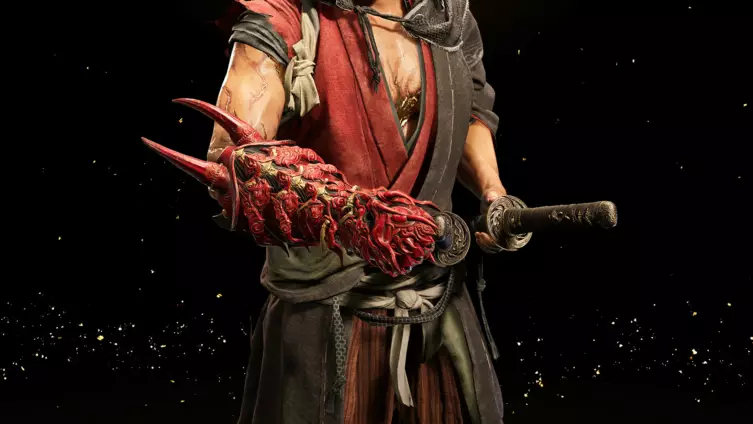
Absorb souls as soon as a safe opening appears, because they can disappear. Do not stand still in front of an enemy ready to strike, though. The good cycle is simple: create space, absorb, then return to combat.

For upgrades, prioritize what fixes your real problem. If your guard breaks, invest in stamina. If you often reach the end of a fight without healing, strengthen survival. If your defense is already consistent, develop the offensive and Oni options you actually use.
Prioritize souls according to the moment of the fight
The most important color changes with the situation. At the start of an encounter, blue souls prepare an Oni Armament that can control a group or accelerate a boss phase. When health drops, yellow souls move ahead of every other resource. Red souls have the greatest value across the whole adventure, but absorbing them should never cost a large portion of your life.
Souls can remain on the ground briefly, so you do not need to pull them in during an enemy combo. Create a window through a parry, a retreat or the fall of a target, then absorb them. In a group, move in a way that keeps the Genma between Musashi and the souls; you will keep the threats in view while absorbing.
Build a coherent progression path
Avoid spreading resources across every available upgrade. First choose a core that matches your style: stamina and safety while learning, stamina damage to trigger more Break Issen, or Oni power if you often use Armaments. Once that core works, fill in secondary branches. This temporary specialization creates a visible benefit faster than scattered small upgrades.
Before a major purchase, ask whether the upgrade solves a problem you met during the last three fights. If the answer is no, keep your red souls. New shop tiers and rare materials can make a reserve much more useful a few missions later.
The seven Oni Armaments and charms
The katana remains Musashi's central weapon. Oni Armaments spend the power built with blue souls, and each one answers a specific situation. Three are obtained during the story and four require opening a chest, but they can still be collected before the point of no return.
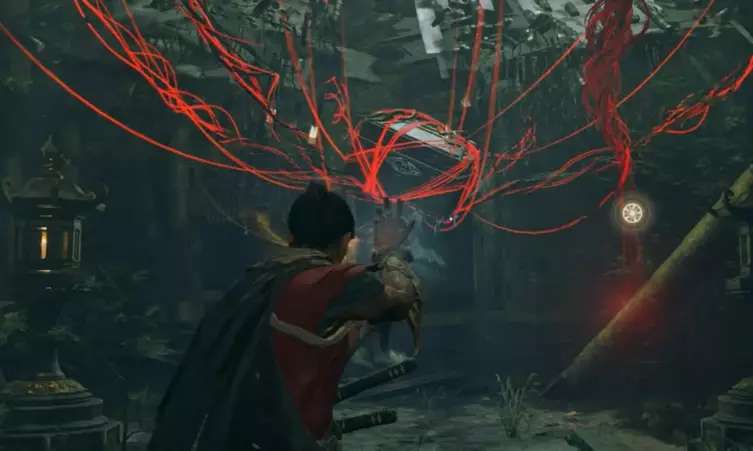
| Oni Armament | How to get it | Recommended use |
|---|---|---|
| The Two Celestials | Chest freed by the second Thread Genma at Kiyomizu-dera | Survival: successful hits make yellow souls appear |
| Oni Bow | Main path in the Oni Refuge | Range, mechanisms and temporary blocking of stamina regeneration |
| Wind-Whipper | "The Oni's Apprentice" mission | Group control and fire synergy |
| Earth-Shakers | Underground laboratory, level 4, after the fan puzzle | Staggering and heavily protected enemies |
| Firebird Flute | South of Gojo Street after "Shadows Fall" | Persistent burn and area attacks |
| Flashing Void | Cave in the Mount Oe castle courtyard | Massive damage on a priority target |
| Still Water | Northeast of the Arashiyama swamp | Temporary katana boost and purple soul generation |
The locations were cross-checked with this guide to the seven Oni Armaments. The best choice depends on the fight: Wind-Whipper and Firebird Flute handle groups, Earth-Shakers and Flashing Void target resistant enemies, while The Two Celestials secures a situation where health is the problem.

Choose and upgrade your charms wisely
Charms provide passive effects and can be upgraded. Build your selection around a clear need instead of scattering resources: recovery to survive, stamina to defend longer, Oni power to use more Armaments, or damage if your timings are already solid.
After several failures against a boss: change Armament and charms before repeating exactly the same strategy.
How to use each Oni Armament effectively
The Two Celestials: recover health by attacking
This pair of blades is ideal when health becomes the main issue. Successful hits make yellow souls appear, which turns an offensive opening into recovery. Wait for a real window, however: activating the Armament into an enemy attack wastes the blue gauge and can make the situation worse. Against a boss, use it after a parry, a stagger or a long animation that has clearly ended.
Oni Bow: prepare close combat
The bow is not only for hitting a distant target or activating certain mechanisms. Its charged shot can temporarily stop stamina regeneration, helping you preserve the work already done before returning to the katana. It is especially practical against a mobile enemy, a shooter or a target that would be dangerous to chase through a group.
Wind-Whipper: regain space
The Wind-Whipper vortex hits nearby enemies and destabilizes a group starting to surround Musashi. Its best use is not always finishing a target: it can simply recreate a safe area, reset the camera and let you absorb souls already on the ground. If it meets a fire source, its effect can be strengthened, especially in combination with Firebird Flute.
Earth-Shakers: break firm defenses
The hammers favor impact over speed. Bring them out against enemies whose guard or stamina resists your usual answers. They are less suited to a very mobile target or a spread-out group, because a poorly started attack gives the enemy more time to reposition. First create a short opening, then use their power to push the enemy gauge closer to Break Issen.
Firebird Flute: maintain pressure with fire
The flute launches incendiary projectiles and applies damage that continues after impact. It becomes useful when you need to keep distance or hit several enemies in the same area. A charged attack increases the effect and stagger, but requires a longer window. Its synergy with Wind-Whipper lets you turn group control into persistent damage.
Flashing Void: strike a priority target
This lightning spear concentrates its value into one heavy strike. The slowdown while preparing the charged attack makes aiming easier, but you still need to choose the right moment. Save it for bosses, dangerous enemies or a target whose removal will simplify the whole fight. Upgrades can also strengthen its interaction with Break Issen and red souls.
Still Water: extend your katana game
Still Water does not immediately replace the katana: it strengthens it for a short time and makes purple souls appear. It therefore suits players who prefer to keep their usual strike rhythm. Activate it when you know you can maintain pressure, then trigger the final wave just before the effect expires so you do not lose that last source of damage and souls.
Three simple charm orientations
Learning setup: prioritize health, recovery and stamina. It forgives missed timings more often and keeps you in a fight long enough to learn animations. This choice is especially relevant when discovering a new area or boss.
Break Issen setup: combine effects that support stamina, Deflects and damage dealt to enemy gauges. The goal is to create more staggers, then immediately convert that opening. Earth-Shakers naturally complements this approach against heavy defenses.
Oni setup: choose bonuses that improve the availability or efficiency of Oni powers. This direction works best if you truly adapt the Armament to each encounter. It loses some of its value if the gauge stays full for long stretches or is spent on the first target in sight.
These orientations are not final builds. After a failure, identify the cause: lack of healing, broken guard, uncontrollable group or insufficient damage during a specific phase. Then change only one or two elements, so you understand what actually improves the result.
Beginner mistakes to avoid
- Mashing attack: end your combo as soon as a dangerous animation begins.
- Confusing parry and Deflect: the first creates an opening and fills the Blaze Gauge; the second mainly attacks stamina.
- Forcing True Issen: use guard or parry first while the enemy rhythm is still unknown.
- Missing Break Issen: watch the enemy gauge and strike as soon as it reaches zero.
- Absorbing at the wrong time: one soul is not worth the damage taken during the animation.
- Spending Oni power on a weak enemy: save it for a phase where it truly changes the fight.
- Keeping the same equipment: adapt Armament and charms to the problem you are facing.
Turn every defeat into a diagnosis
After a death, do not stop at "my timing was bad." Identify the event that actually shifted the fight. If your guard broke, watch your stamina more carefully and shorten your punishes. If an attack came from off-screen, work on positioning and lock-on. If the boss recovered stamina, use Oni Bow or maintain more regular pressure. If you lack healing, prepare The Two Celestials and survival charms.
Change only one variable at a time. Altering difficulty, Armament, charms and strategy all at once makes it impossible to know what worked. One precise adjustment followed by two or three attempts produces much faster learning than a string of improvised setups.
New Game Plus and Carnage mode: what carries over?
Finishing the story unlocks New Game Plus and Carnage, a difficulty where one mistake can be fatal. Once Carnage is chosen, that run can no longer return to Story or Action.
Items and progress kept
- Awakened Oni abilities and upgraded base or special skills;
- Obtained Hozuki Pouches and their upgrades;
- Charms and charm upgrades;
- Unlocked outfits, items, offerings and part of your materials;
- Training, boss rematches, Genma Notes and rescued Lion Dogs.
Items and progress reset
- Main story and side quest progression;
- Outfit, sword and Gauntlet levels, plus their dedicated materials;
- Red souls, Spirit Mirror save points and Oni Bow;
- Progression on items purchased with red souls.
These transfer rules are detailed in PC Gamer's New Game Plus recap. Before starting Carnage, train Deflects and Issen during boss rematches: retained skills help, but the main equipment upgrades start from zero again.
What to finish before restarting
Before launching New Game Plus, use the possible return before the final mission to recover optional Armaments, finish activities that unlock charms and complete available training. Since Genma Notes, rescued Lion Dogs and boss rematches are kept, every completed objective reduces the work you need to repeat during the next run.
Also spend resources that will not transfer. Red souls and the materials tied to outfit, sword and Gauntlet levels are reset, so hoarding them without a clear plan gives no advantage in the next cycle. Charm upgrades and retained skills, however, justify one last pass through the menus before the ending.
Prepare specifically for Carnage mode
Carnage punishes bad habits much more severely. Train yourself to stop a combo before becoming vulnerable, distinguish a parryable attack from one that must be dodged and handle a boss without depending constantly on healing items. Rematches are the best training ground: you already know the animations and can work on one precise mechanic without replaying an entire mission.
Plan an early setup focused on consistency. Retained skills and some bonuses provide a real head start, but the main equipment levels reset to zero. A defensive approach, charms useful from the first hours and solid Break Issen mastery compensate for that loss better than a strategy based only on raw damage.
FAQ: Onimusha: Way of the Sword
Which difficulty should I choose first?
Story mode suits new players, while Action mode is better for players used to action games. You can switch between them at save points.
Can you change difficulty during the game?
Yes, between Story and Action. Carnage mode is a final choice for that run and does not allow you to return to the two other modes.
How do you perform a True Issen?
Launch your attack just before the enemy strike touches Musashi. Practice first on a Genma whose animation you know well.
How do you trigger a Break Issen?
Fully drain the enemy stamina gauge, especially with Deflects, then immediately exploit the opening that appears.
What are red, yellow and blue souls for?
Red souls pay for skills and purchases, yellow souls restore health and blue souls fill the gauge used by Oni Armaments.
How many Oni Armaments are there?
There are seven: The Two Celestials, Oni Bow, Wind-Whipper, Earth-Shakers, Firebird Flute, Flashing Void and Still Water.
Can you recover a missed Oni Armament?
Yes. The four optional Armaments can be collected by returning to the relevant areas before the point of no return. After the credits, Continue also places the save before the final mission.
How do you unlock Carnage mode?
Finish the story once. Carnage then becomes available with New Game Plus.
What carries over in New Game Plus?
It keeps upgraded skills, charms, some Oni upgrades, outfits and several collectibles, but resets the story as well as sword, outfit and Gauntlet levels.
The right rhythm for steady progress
Progression depends less on one universal combo than on a coherent cycle: observe, choose the right defense, reduce stamina, exploit the opening, then absorb souls. Guard secures learning, parry returns initiative, Deflect prepares Break Issen and True Issen rewards a perfect read.
Add an adapted Oni Armament and charms chosen for your current difficulty, and fights that once seemed chaotic become readable duels where every decision has a precise function.